[Part 3] How to Integrate Kotlin Multiplatform (KMP) into Your iOS Project
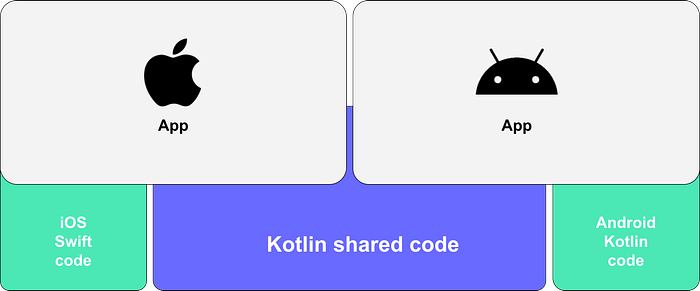
Kotlin Multiplatform(KMP) allows you to share code between Android and iOS applications, making development faster and more efficient.
This guide will walk you through the steps to integrate KMP into an existing iOS project, ensuring that you can leverage shared code without compromising the unique features of your iOS app.
This is Part 3 of the KMP series. If you haven’t already, you can check out
Prerequisites:
- An existing iOS app.
- KMP shared module created and integrated with your Android project.
Step 1: Create ios folder
- Create ios folder in root app.
- Copy your existing iOS project files and paste under ios folder.
- Now your Main Project should have three modules: app, shared and ios
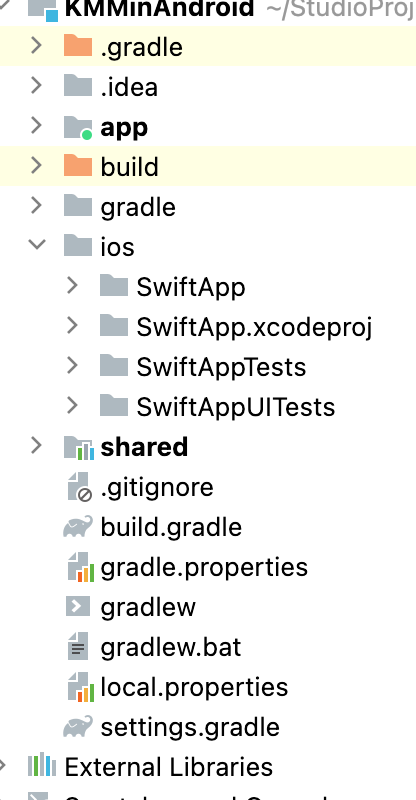
Step 2: Set Up XCFramework
- Open your
gradle.propertiesfile and add:
xcodeproj=~/ios- Check if the
XCFrameworksfolder is generated under
shared > build > XCFramework
- If not, add these 3 line in your shared module's
build.gradle.kts
1. import org.jetbrains.kotlin.gradle.plugin.mpp.apple.XCFramework
2. val xcf = XCFramework()
3. xcf.add(this)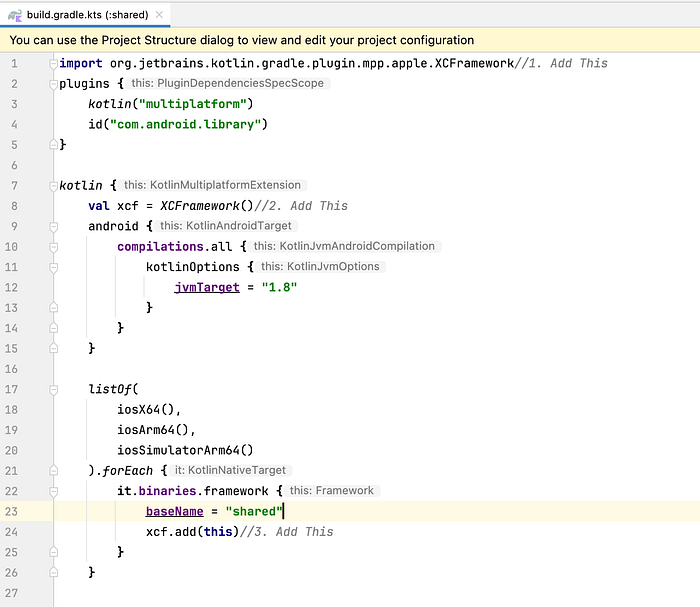
- Now Run in your root project folder:
./gradlew :shared:assembleSharedXCFrameworkIf this gradle task not found you can get tasks lists with
./gradlew tasksand most probably you will get assembleXCFramework, this is generic task and it will generate XCFramework for all kmp module’s
./gradlew assembleXCFramework- After successful build, you will see XCFramework is generated now under shared > build folder
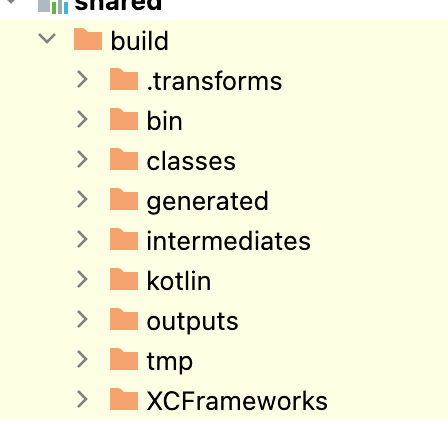
Step 3: Integrate XCFramework with Xcode
- Open ios folder in Xcode.
- Add the XCFramework to ios project:
- Go to
Targets -> Project -> General -> Frameworks, Libraries, and Embedded Content.
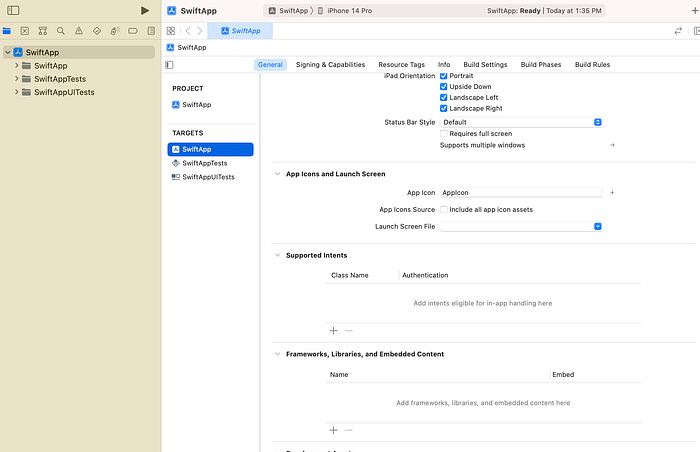
- Click
+ -> Add Other -> Add Files.
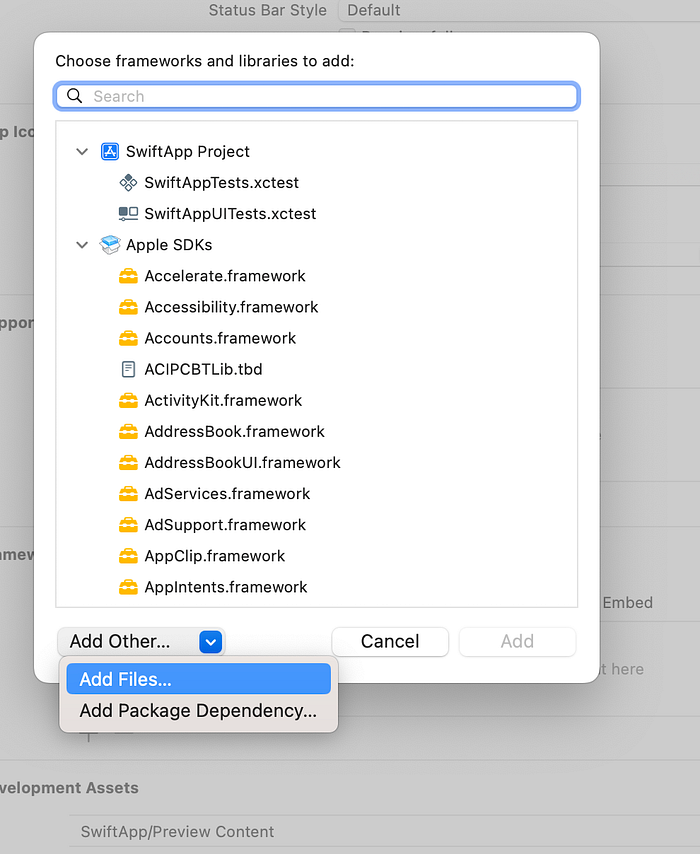
- Navigate to
android -> shared -> build -> XCFrameworks -> debug -> shared.xcframeworkand add it.
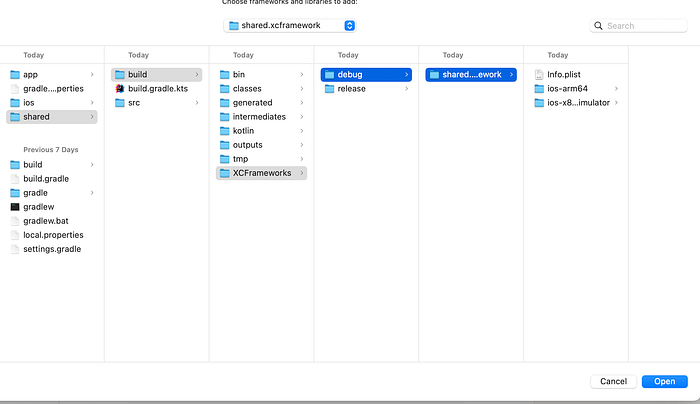
- Now it looks like this:

Step 4: Update the XCFramework Path
- Go to
Targets -> Build Settingsand select all as well if not already selected - Search for
Search Paths -> Framework Search Paths.
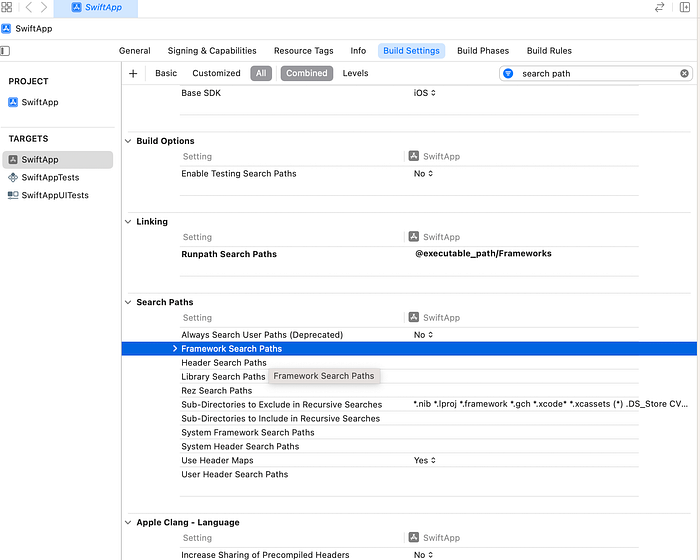
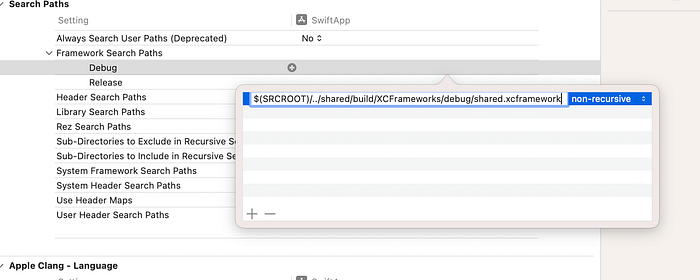
- Add:
$(SRCROOT)/../shared/build/XCFrameworks/debug/shared.xcframeworkEnsure there are no line breaks in this path.
Step 5: Add a Build Script
- Go to
Targets -> Project -> Build Phases -> + (Add) -> New Run Script Phase.
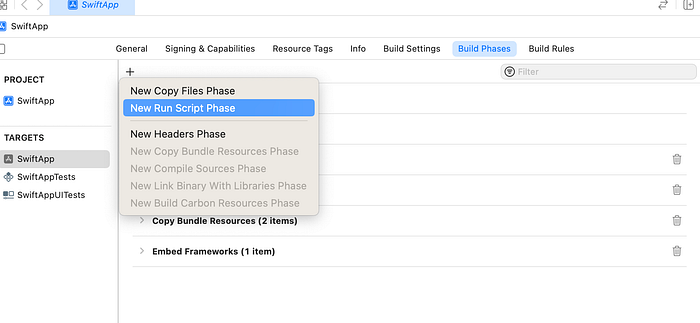
- Add the following script:
cd "$SRCROOT/.."
./gradlew :shared:packForXCode -PXCODE_CONFIGURATION=${CONFIGURATION}
Enable both options, “For install builds only” and “Based on dependency analysis”.
Step 6: Use Shared Code in Your iOS App:
And its done, you successfully integrated KMP in iOS. Now you can use shared module code in iOS Project.
- In your SwiftUI file, import the shared module:
import shared- In your App Delegate, use:
#import "shared/shared.h"Final Verification
Build your iOS project to verify that everything is integrated correctly and that the shared code functions as expected.
By following these steps, you can successfully integrate KMP into your existing iOS project, allowing you to share code seamlessly between Android and iOS, enhancing your development process and reducing duplication of effort.
Stay tuned for more in this series, where we will explore integrating KMP into other platforms like React Native.

![[Part 2] Seamlessly Integrate Kotlin Multiplatform(KMP) into Your Android Project](https://miro.medium.com/v2/resize:fit:679/1*zRkgF8wWQtzr-owKAZB-IA.png)
